前言
「好久不见,甚至想念」距离上一次更新已经是去年 5 月 1 日了,2022 年的年度总结也没发hhh,主要还是因为“咕咕咕”。上一篇博文说的是关于 macOS 的 PHP 集成开发环境,那么这篇博文可以理解为上篇文章的下篇力。这篇介绍的自行编写一个 docker-compose 来实现,首先还是先来安装 Docker 罢。
Docker 初步食用
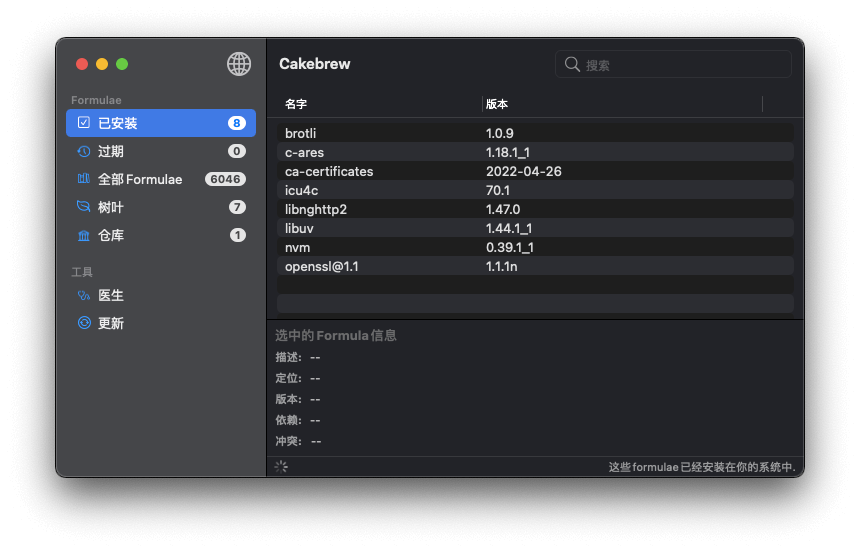
安装 Docker 我推荐使用 Homebrew,我也推荐一个 APP (Cakebrew)可以用于图形化管理 Homebrew,挺方便的。

打开终端,输入
$ brew install --cask --appdir=/Applications docker
==> Downloading https://desktop.docker.com/mac/main/amd64/99724/Docker.dmg
######################################################################## 100.0%
==> Installing Cask docker
==> Moving App 'Docker.app' to '/Applications/Docker.app'
==> Linking Binary 'docker.zsh-completion' to '/usr/local/share/zsh/site-functio
==> Linking Binary 'docker-compose.fish-completion' to '/usr/local/share/fish/ve
==> Linking Binary 'docker-compose.zsh-completion' to '/usr/local/share/zsh/site
==> Linking Binary 'docker.bash-completion' to '/usr/local/etc/bash_completion.d
==> Linking Binary 'docker.fish-completion' to '/usr/local/share/fish/vendor_com
==> Linking Binary 'docker-compose.bash-completion' to '/usr/local/etc/bash_comp
docker was successfully installed!
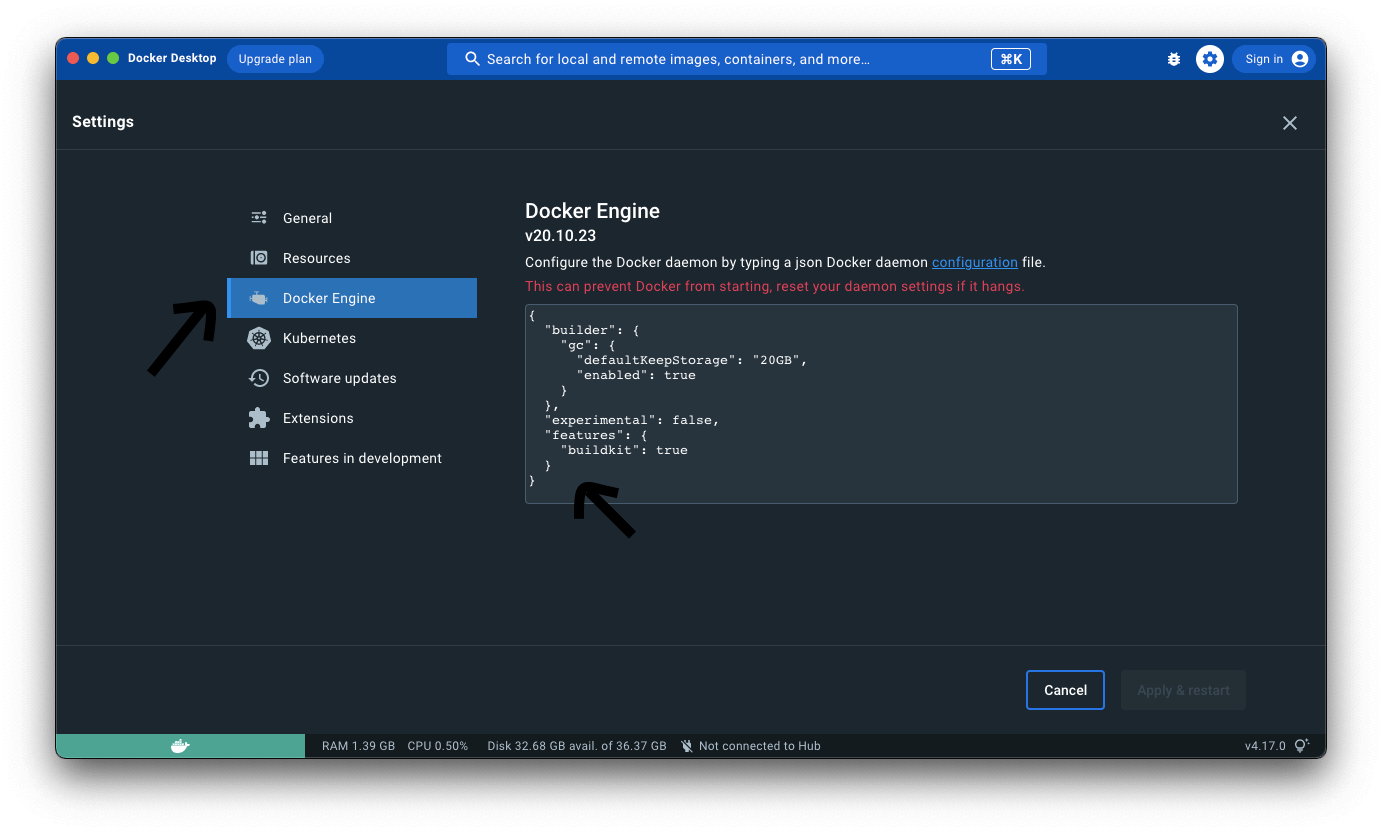
若出现上方语句则表示 Docker 安装完毕力!打开 Docker 进入 Setting 添加下镜像加速

{
  "builder": {
    "gc": {
      "defaultKeepStorage": "20GB",
      "enabled": true
    }
  },
  "experimental": false,
  "features": {
    "buildkit": true
  },
  "registry-mirrors": ["https://docker.mirrors.ustc.edu.cn/"]
}
当然,镜像加速源也不止这些,咱从隔壁菜鸟教程搬了点过来(
- 科大镜像:https://docker.mirrors.ustc.edu.cn/
- 网易:https://hub-mirror.c.163.com/
阿里云:https://<你的ID>.mirror.aliyuncs.com
- 七牛云加速器:https://reg-mirror.qiniu.com
Docker Compose 编写
# Compose 配置文件版本
version: '3.0'
# 服务
services:
  # Nginx
  nginx:
    # 食用最新的 Nginx 镜像,可以通过冒号指定版本,例子如下
    image: nginx # nginx:stable
    # 容器名字,可以用 容器名 代替 容器IP 来食用
    container_name: nginx
    # 端口映射(宿主机端口:虚拟机端口)
    ports:
      - "80:80"
      - "443:443"
    # 挂载文件 or 文件夹(宿主机地址:虚拟机地址:权限)
    volumes:
      - "./conf/nginx:/etc/nginx:rw"
      - "./files:/files:rw"
      - "./wwwroot:/wwwroot:rw"
      - "./log/nginx:/var/log/nginx:rw"
    # 总是重启服务容器
    restart: always
    # 环境变量设置
    environment:
      - TZ=Asia/Chengdu
    # 保持容器继续运行
    tty: true
    # 网络配置
    networks:
      - lnmp
  # PHP
  php74:
    image: php:7.4-fpm
    container_name: php74
    volumes:
      - "./conf/php/7.4:/usr/local/etc:rw"
      - "./files:/files:rw"
      - "./wwwroot:/wwwroot:rw"
      - "./log/php/7.4:/var/log/php:rw"
    environment:
      - TZ=Asia/Chengdu
    tty: true
    networks:
      - lnmp
  mysql:
    image: mysql:5.7
    container_name: mysql
    ports:
      - "3306:3306"
    volumes:
      - "./db:/var/lib/mysql:rw"
      - "./files:/files:rw"
      - "./log/mysql:/var/log/mysql:rw"
    restart: always
    environment:
      - TZ=Asia/Chengdu
      # Mysql 数据库 root 用户密码设置
      - MYSQL_ROOT_PASSWORD=123456
    tty: true
    networks:
      - lnmp
# 网络
networks:
  # 网络名
  lnmp:
    driver: bridge
    ipam:
      driver: default
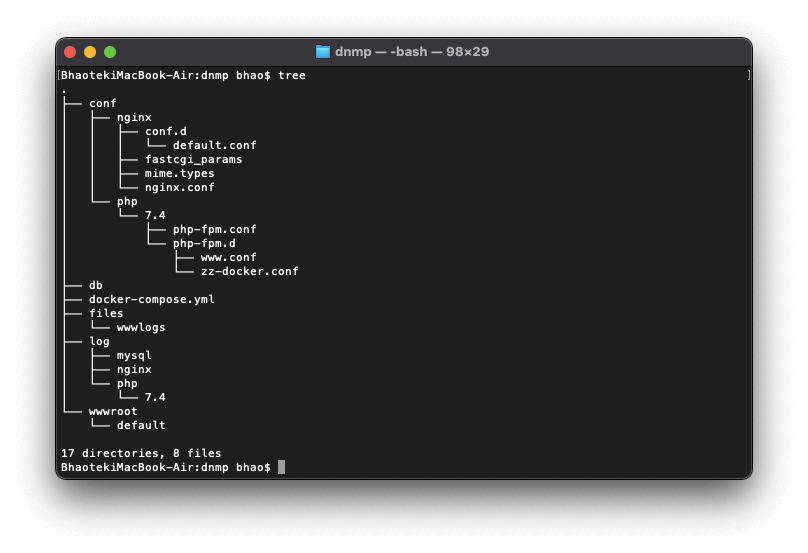
编写好 docker-compose.yml 后,就开始根据所需要的要求创建目录,目录树如下图所示力

配置文件编写
根据目录树创建好目录后,需要给 Nginx 和 PHP 丢下配置文件
/conf/php/7.4/php-fpm.conf
代码省略较多,详细的可以去找找 php-fpm.conf.default
[global]
error_log = /files/wwwlogs/php-fpm.log
log_level = notice
log_limit = 4096
include=etc/php-fpm.d/*.conf
/conf/php/7.4/php-fpm.d/www.conf
代码省略较多,详细的可以去找找 www.conf.default
[www]
user = www-data
group = www-data
listen = [::]:9000
pm = dynamic
pm.max_children = 5
pm.start_servers = 2
pm.min_spare_servers = 1
pm.max_spare_servers = 3
security.limit_extensions = .php
/conf/php/7.4/php-fpm.d/zz-docker.conf
[global]
daemonize = no

[www]
listen = 9000
/conf/nginx/nginx/conf
user  nginx;
worker_processes  auto;

error_log  /var/log/nginx/error.log notice;
pid        /var/run/nginx.pid;

events {
    worker_connections  1024;
}

http {
    include       /etc/nginx/mime.types;
    default_type  application/octet-stream;

    log_format  main  '$remote_addr - $remote_user [$time_local] "$request" '
                      '$status $body_bytes_sent "$http_referer" '
                      '"$http_user_agent" "$http_x_forwarded_for"';

    access_log  /var/log/nginx/access.log  main;

    sendfile        on;
    #tcp_nopush     on;

    keepalive_timeout  65;

    #gzip  on;

    include /etc/nginx/conf.d/*.conf;
}
/conf/nginx/mime.types
types {
    text/html                                        html htm shtml;
    text/css                                         css;
    text/xml                                         xml;
    image/gif                                        gif;
    image/jpeg                                       jpeg jpg;
    application/javascript                           js;
    application/atom+xml                             atom;
    application/rss+xml                              rss;

    text/mathml                                      mml;
    text/plain                                       txt;
    text/vnd.sun.j2me.app-descriptor                 jad;
    text/vnd.wap.wml                                 wml;
    text/x-component                                 htc;

    image/avif                                       avif;
    image/png                                        png;
    image/svg+xml                                    svg svgz;
    image/tiff                                       tif tiff;
    image/vnd.wap.wbmp                               wbmp;
    image/webp                                       webp;
    image/x-icon                                     ico;
    image/x-jng                                      jng;
    image/x-ms-bmp                                   bmp;

    font/woff                                        woff;
    font/woff2                                       woff2;

    application/java-archive                         jar war ear;
    application/json                                 json;
    application/mac-binhex40                         hqx;
    application/msword                               doc;
    application/pdf                                  pdf;
    application/postscript                           ps eps ai;
    application/rtf                                  rtf;
    application/vnd.apple.mpegurl                    m3u8;
    application/vnd.google-earth.kml+xml             kml;
    application/vnd.google-earth.kmz                 kmz;
    application/vnd.ms-excel                         xls;
    application/vnd.ms-fontobject                    eot;
    application/vnd.ms-powerpoint                    ppt;
    application/vnd.oasis.opendocument.graphics      odg;
    application/vnd.oasis.opendocument.presentation  odp;
    application/vnd.oasis.opendocument.spreadsheet   ods;
    application/vnd.oasis.opendocument.text          odt;
    application/vnd.openxmlformats-officedocument.presentationml.presentation
                                                     pptx;
    application/vnd.openxmlformats-officedocument.spreadsheetml.sheet
                                                     xlsx;
    application/vnd.openxmlformats-officedocument.wordprocessingml.document
                                                     docx;
    application/vnd.wap.wmlc                         wmlc;
    application/wasm                                 wasm;
    application/x-7z-compressed                      7z;
    application/x-cocoa                              cco;
    application/x-java-archive-diff                  jardiff;
    application/x-java-jnlp-file                     jnlp;
    application/x-makeself                           run;
    application/x-perl                               pl pm;
    application/x-pilot                              prc pdb;
    application/x-rar-compressed                     rar;
    application/x-redhat-package-manager             rpm;
    application/x-sea                                sea;
    application/x-shockwave-flash                    swf;
    application/x-stuffit                            sit;
    application/x-tcl                                tcl tk;
    application/x-x509-ca-cert                       der pem crt;
    application/x-xpinstall                          xpi;
    application/xhtml+xml                            xhtml;
    application/xspf+xml                             xspf;
    application/zip                                  zip;

    application/octet-stream                         bin exe dll;
    application/octet-stream                         deb;
    application/octet-stream                         dmg;
    application/octet-stream                         iso img;
    application/octet-stream                         msi msp msm;

    audio/midi                                       mid midi kar;
    audio/mpeg                                       mp3;
    audio/ogg                                        ogg;
    audio/x-m4a                                      m4a;
    audio/x-realaudio                                ra;

    video/3gpp                                       3gpp 3gp;
    video/mp2t                                       ts;
    video/mp4                                        mp4;
    video/mpeg                                       mpeg mpg;
    video/quicktime                                  mov;
    video/webm                                       webm;
    video/x-flv                                      flv;
    video/x-m4v                                      m4v;
    video/x-mng                                      mng;
    video/x-ms-asf                                   asx asf;
    video/x-ms-wmv                                   wmv;
    video/x-msvideo                                  avi;
}
/conf/nginx/conf.d/default.conf
server {
    listen       80;
    listen  [::]:80;
    root   /wwwroot/default;
    index  index.php index.html error/index.html;
    server_name  localhost;
    error_page   500 502 503 504 403 404 405  /error.html;
    location = /error.html {
        root   /wwwroot/default;
    }
    location ~ /\.ht {
       deny  all;
    }
    location / {
        root   /wwwroot/default;
    }
    location ~ .+(?<=\.php)$ {
        root /wwwroot/default;
        fastcgi_pass   php74:9000;
        fastcgi_param  SCRIPT_FILENAME  $document_root$fastcgi_script_name;
        fastcgi_index  index.php;
        include        fastcgi_params;
        fastcgi_intercept_errors on;

    }
    access_log  /files/wwwlogs/default.access.log;
}
/conf/nginx/fastcgi_params
fastcgi_param  QUERY_STRING       $query_string;
fastcgi_param  REQUEST_METHOD     $request_method;
fastcgi_param  CONTENT_TYPE       $content_type;
fastcgi_param  CONTENT_LENGTH     $content_length;

fastcgi_param  SCRIPT_NAME        $fastcgi_script_name;
fastcgi_param  REQUEST_URI        $request_uri;
fastcgi_param  DOCUMENT_URI       $document_uri;
fastcgi_param  DOCUMENT_ROOT      $document_root;
fastcgi_param  SERVER_PROTOCOL    $server_protocol;
fastcgi_param  REQUEST_SCHEME     $scheme;
fastcgi_param  HTTPS              $https if_not_empty;

fastcgi_param  GATEWAY_INTERFACE  CGI/1.1;
fastcgi_param  SERVER_SOFTWARE    nginx/$nginx_version;

fastcgi_param  REMOTE_ADDR        $remote_addr;
fastcgi_param  REMOTE_PORT        $remote_port;
fastcgi_param  SERVER_ADDR        $server_addr;
fastcgi_param  SERVER_PORT        $server_port;
fastcgi_param  SERVER_NAME        $server_name;

# PHP only, required if PHP was built with --enable-force-cgi-redirect
fastcgi_param  REDIRECT_STATUS    200;
食用 Docker Compose
将上面的配置文件编写好后,输入
$ docker compose up就成功搭建好力!
站点文件夹在 wwwroot 里面,可以通过在 /conf/nginx/conf.d 文件夹中新建多个 conf 文件进行多站点哦(注意文件夹路径就行)
后续如果想让 Docker Compose 在后台运行的话,可以这样输入
$ docker compose up -d # 启动

$ docker compose down # 关闭
后言
目前只是说了从安装到基础食用,还有挺多东西没讲的,那就分多次来讲罢(
感谢 @LemonPerfect 的帮忙和指导!!!
如果还有什么其他的东西有错的话,也欢迎大佬们指正哇
参考文献


